存储插件
详细介绍如何配置和开发 Free FS 的存储插件。
架构概述
Free FS 采用插件化存储架构,支持通过 SPI(Service Provider Interface)机制动态加载存储平台插件。系统通过 @StoragePlugin 注解声明插件元数据,并在应用启动时自动扫描、加载并同步插件信息到数据库。
核心组件
- IStorageOperationService: 存储操作接口,定义了所有存储平台必须实现的方法。
- @StoragePlugin: 存储插件注解,用于标注实现类并声明平台标识、名称、图标及配置 Schema 等元数据。
- StoragePluginRegistry: 插件注册器,负责通过 SPI 加载和注册插件,并管理插件元数据。
- StorageInstanceFactory: 存储实例工厂,根据配置创建具体的存储操作实例。
- StorageInstanceCache: 存储实例缓存,管理已创建实例的生命周期。
- StorageConfig: 存储配置类,封装存储平台的配置属性。
插件加载与同步流程
- 扫描加载:系统启动时,
StoragePluginRegistry通过 Java SPI 机制扫描并加载所有实现IStorageOperationService接口且标注了@StoragePlugin的类。 - 元数据提取:解析注解中的
identifier、name、configSchema等信息,生成插件元数据。 - 自动同步:系统自动将扫描到的插件信息同步到数据库的
storage_platform表,无需手动执行 SQL 插入。 - 实例创建:当业务需要使用存储时,系统通过
StorageInstanceFactory调用插件原型的createConfiguredInstance方法创建配置化实例并缓存。
如何快速创建一个存储插件?
方式一:基于 S3 兼容存储(推荐)
如果你的存储平台兼容 S3 API(如 MinIO、腾讯云 COS、AWS S3、Cloudflare R2 等),可以继承 AbstractS3CompatibleStorageService,只需少量代码即可完成实现。
方式二:完全自定义实现
如果存储平台有独特的 API(如阿里云 OSS、华为云 OBS、七牛云等),可以继承 AbstractStorageOperationService,实现相关接口方法。
实现步骤
步骤 1:创建配置类
首先,创建一个配置类来定义你的存储平台需要哪些配置项。建议使用 @Data 注解简化代码。
S3 兼容存储示例:
package com.xddcodec.fs.storage.plugin.yourplatform.config;

import com.xddcodec.fs.storage.plugin.core.s3.S3CompatibleConfig;
import lombok.Data;
import lombok.EqualsAndHashCode;

@Data
@EqualsAndHashCode(callSuper = true)
public class YourPlatformConfig extends S3CompatibleConfig {
    // S3CompatibleConfig 已包含 endpoint, accessKey, secretKey, bucket, region 等常用项
    // 如果需要额外的配置项,可以在这里添加
    // private String customField;
}
完全自定义示例:
package com.xddcodec.fs.storage.plugin.yourplatform.config;

import lombok.Data;

@Data
public class YourPlatformConfig {
    private String endpoint;
    private String accessKey;
    private String secretKey;
    private String bucket;
    // 其他自定义配置项...
}
步骤 2:实现存储服务类并标注注解
S3 兼容存储实现:
package com.xddcodec.fs.storage.plugin.yourplatform;

import com.xddcodec.fs.storage.plugin.core.annotation.StoragePlugin;
import com.xddcodec.fs.storage.plugin.core.config.StorageConfig;
import com.xddcodec.fs.storage.plugin.core.s3.AbstractS3CompatibleStorageService;
import com.xddcodec.fs.storage.plugin.yourplatform.config.YourPlatformConfig;

@StoragePlugin(
    identifier = "YourPlatform",
    name = "你的平台名称",
    description = "这是一个基于 S3 协议的存储平台",
    icon = "icon-storage", // 对应前端图标标识
    configSchema = "[{\"label\": \"Endpoint\", \"identifier\": \"endpoint\", \"dataType\": \"string\", \"validation\": {\"required\": true}}]"
    // 或者使用 schemaResource 指定资源文件
)
public class YourPlatformStorageServiceImpl
        extends AbstractS3CompatibleStorageService<YourPlatformConfig> {

    // 原型构造函数(SPI 加载用)
    public YourPlatformStorageServiceImpl() {
        super();
    }

    // 配置化构造函数(业务使用)
    public YourPlatformStorageServiceImpl(StorageConfig config) {
        super(config);
    }

    @Override
    protected Class<YourPlatformConfig> getS3ConfigClass() {
        return YourPlatformConfig.class;
    }
}
完全自定义实现:
package com.xddcodec.fs.storage.plugin.yourplatform;

import com.xddcodec.fs.storage.plugin.core.AbstractStorageOperationService;
import com.xddcodec.fs.storage.plugin.core.annotation.StoragePlugin;
import com.xddcodec.fs.storage.plugin.core.config.StorageConfig;
import com.xddcodec.fs.storage.plugin.yourplatform.config.YourPlatformConfig;
import lombok.extern.slf4j.Slf4j;

import java.io.InputStream;

@Slf4j
@StoragePlugin(
    identifier = "YourPlatform",
    name = "你的平台名称",
    schemaResource = "classpath:schema/your-platform-schema.json" // 从资源文件加载配置表单结构
)
public class YourPlatformStorageServiceImpl
        extends AbstractStorageOperationService {

    private YourPlatformClient client; // 第三方 SDK 客户端

    public YourPlatformStorageServiceImpl() { super(); }

    public YourPlatformStorageServiceImpl(StorageConfig config) { super(config); }

    @Override
    protected void validateConfig(StorageConfig config) {
        YourPlatformConfig pc = config.toObject(YourPlatformConfig.class);
        if (pc.getEndpoint() == null) throw new RuntimeException("endpoint is required");
    }

    @Override
    protected void initialize(StorageConfig config) {
        YourPlatformConfig pc = config.toObject(YourPlatformConfig.class);
        this.client = new YourPlatformClient(pc.getEndpoint(), pc.getAccessKey(), pc.getSecretKey());
    }

    @Override
    public void uploadFile(InputStream inputStream, String objectKey) {
        ensureNotPrototype();
        client.putObject(config.getProperty("bucket", String.class), objectKey, inputStream);
    }

    // 实现 IStorageOperationService 的其他方法...
}
步骤 3:配置 SPI
在 src/main/resources/META-INF/services/ 目录下创建文件:
文件名: com.xddcodec.fs.storage.plugin.core.IStorageOperationService
文件内容:
com.xddcodec.fs.storage.plugin.yourplatform.YourPlatformStorageServiceImpl步骤 4:集成到主项目
插件模块开发完成后,需要将其集成到主项目中,以便系统能够加载和使用该插件。
4.1 在 fs-dependencies 中配置版本
在 fs-dependencies 模块的 pom.xml 中添加插件的版本管理:
<dependencyManagement>
    <dependencies>
        <!-- 其他依赖管理... -->

        <!-- 你的存储插件 -->
        <dependency>
            <groupId>com.xddcodec.fs</groupId>
            <artifactId>storage-plugin-yourplatform</artifactId>
            <version>${revision}</version>
        </dependency>
    </dependencies>
</dependencyManagement>
4.2 在 storage-plugin-boot 中添加依赖
在 storage-plugin-boot 模块的 pom.xml 中添加你的插件依赖:
<dependencies>
    <!-- 存储插件核心 -->
    <dependency>
        <groupId>com.xddcodec.fs</groupId>
        <artifactId>storage-plugin-core</artifactId>
    </dependency>

    <!-- 你的存储插件 -->
    <dependency>
        <groupId>com.xddcodec.fs</groupId>
        <artifactId>storage-plugin-yourplatform</artifactId>
    </dependency>
</dependencies>
4.3 验证集成
完成上述配置后:
- 重新编译项目:执行
mvn clean install。 - 启动应用:检查日志确认插件已加载。
使用已开发的插件
步骤 1:验证插件加载
启动应用后,检查日志确认插件已成功加载并同步:
开始加载存储插件...
注册存储插件: 你的平台名称 (YourPlatform)
存储插件加载完成,成功: X, 跳过: 0, 可用平台: [Local, AliyunOSS, HuaweiOBS, RustFS, YourPlatform]
步骤 2:在页面中添加配置
- 访问存储平台管理页面:登录系统后,进入"存储配置"页面。
- 添加新配置:点击"添加配置"按钮,打开配置对话框。
- 选择存储平台:在下拉菜单中选择你开发的存储平台。

- 填写配置信息:根据定义的字段,填写相应的配置项(如 Endpoint、Access-Key 等)。
- 保存配置:点击"保存配置"按钮。
步骤 3:启用配置
- 查看配置列表:在"我的存储配置"区域可以看到新添加的配置。
- 启用配置:点击卡片上的"启用"按钮。系统会自动切换当前存储平台。
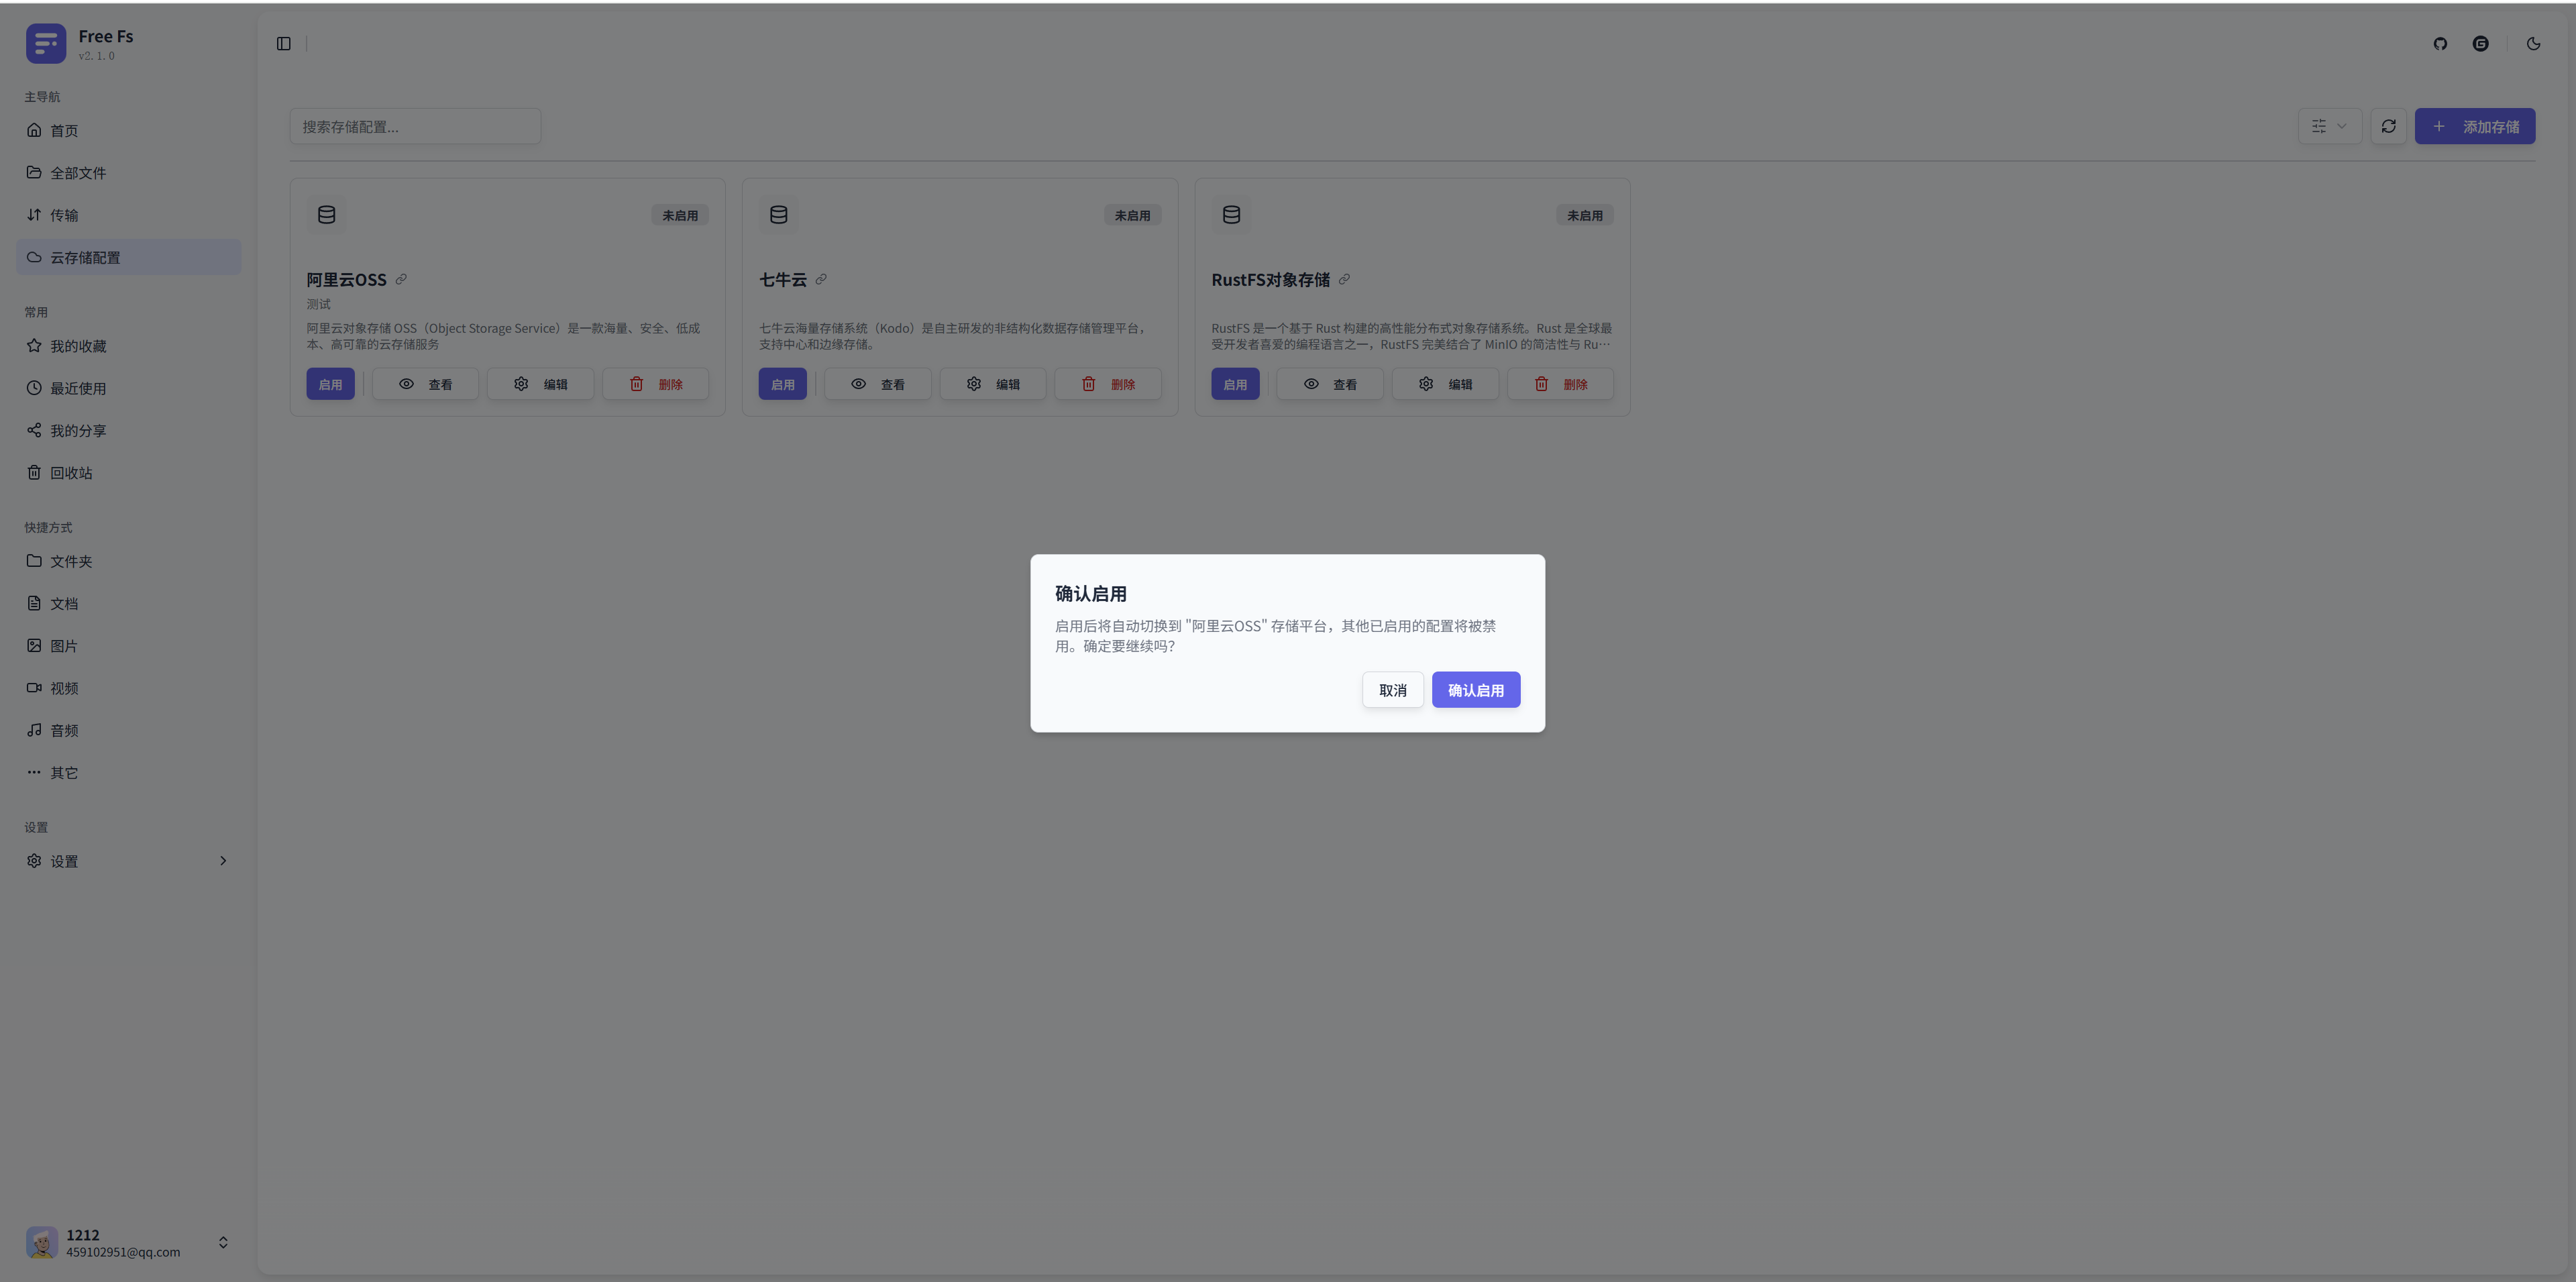
步骤 4:切换存储平台
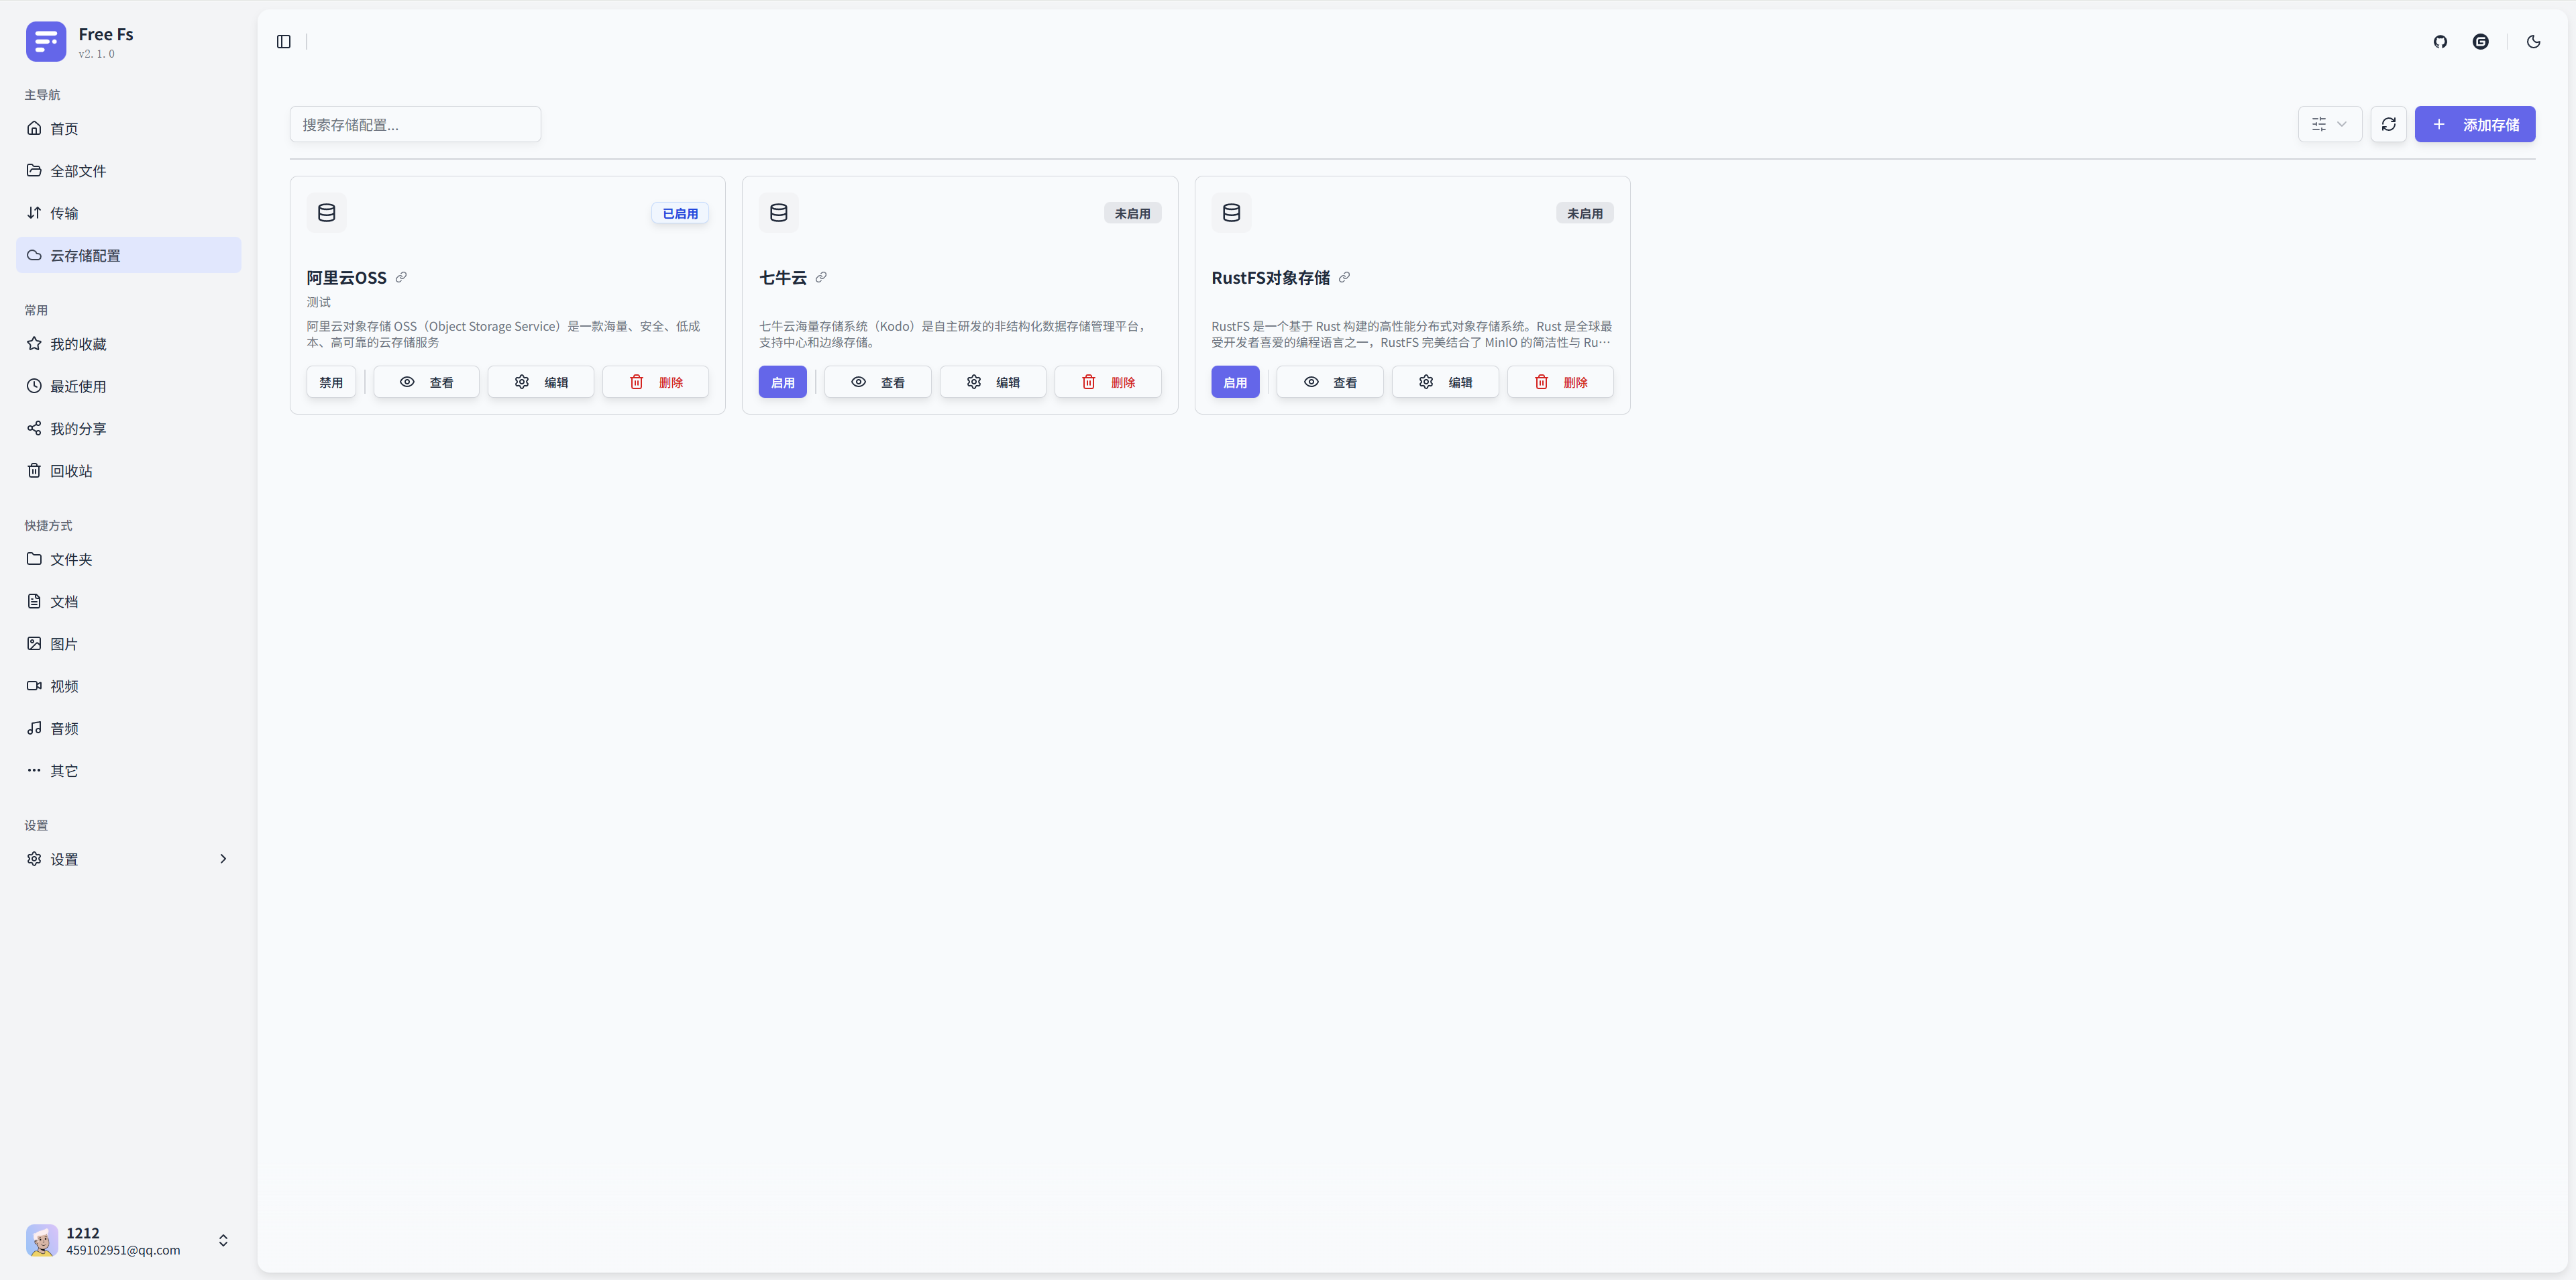
- 同时只能有一个存储配置处于启用状态。
- 如果都不启用,则平台默认使用本地存储插件。
常见问题
Q: 插件已加载,但在下拉列表中看不到?
A: 检查数据库中的 storage_platform 表,确认 identifier 是否与插件中的一致。通常系统会自动同步,如果未出现,请检查日志中的加载错误信息。
Q: 启用配置后无法上传文件? A: 检查存储实例是否创建成功,以及配置的访问凭证是否正确。
注意事项
- @StoragePlugin 注解是强制的:没有该注解的类将不会被注册。
- 必须提供无参构造函数:SPI 实例化需要无参构造函数(原型)。
- 必须提供 StorageConfig 构造函数:用于创建业务操作实例。
- 线程安全:确保存储插件实现是线程安全的。